-
Authenticode Sealing
A while ago I wrote about Authenticode stuffing tricks. In summary, it allows someone to change small parts of a binary even after it has been signed. These changes wouldn’t allow changing how the program behaves, but do allow injecting tracking beacons into the file, even after it has been signed. I’d suggest reading that first if you aren’t familiar with it.
This has been a criticism of mine about Authenticode, and recently I stumbled on a new feature in Authenticode, called sealing, that supposedly fixes two of the three ways that Authenticode allows post-signature changes.
It looks like Authenticode sealing aims to make these stuffing tricks a lot harder. Before we dive in, I want to disclaim that sealing has literally zero documentation from Microsoft. Everything forward from here has been me “figuring it out”. I hope I’m right, but welcome corrections. I may be entirely wrong, so please keep that in mind.
Recall that two ways of injecting data in to an Authenticode signature can be done in the signatures themselves, because not all parts of the signature are actually signed. This includes the certificate table as well as the unauthenticated attributes section of the signature. Sealing prevents those sections from changing once the seal has been made.
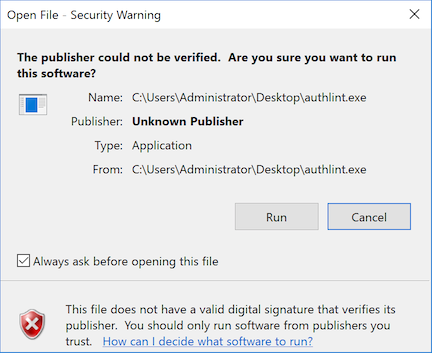
It starts with an “intent to seal” attribute. Intent to seal is done when applying the primary signature to a binary. We can apply an intent to seal attribute using the
/itosoption withsigntool. For example:signtool sign /sha1 2d0366fa88640481456079fd864f3f02c8103867 /fd sha256 /tr http://timestamp.digicert.com /td SHA256 /itos authlint.exeAt this point the file has a primary signature and a timestamp, but the signature is not valid. It has been marked as “intent to seal” but no seal has been applied. Windows treats it as a bad signature if I try to run it.
Intent to seal is an authenticated attribute. That is, the signature at this point includes the intention in its own signature. I could not remove the intent to seal attribute without invalidating the whole signature.
Now at this point I could add a nested signature, if I want, since the seal hasn’t been finalized. I’ll skip that, but it’s something you could do if you are using dual signatures.
The next step is to seal it:
signtool sign
    /sha1 2d0366fa88640481456079fd864f3f02c8103867
    /seal /tseal http://timestamp.digicert.com
    /td SHA256 authlint.exe
This finishes off the seal and timestamps the seal. Note that I am using the same certificate as the one that was used in the primary signature. If I use a different certificate, the seal is applied by removing the entire signature, and re-signed with that certificate. Thus, you cannot seal a signature using a different certificate without changing the primary signature in the first place.
Now we have a sealed signature. What happens if I try appending a signature using the
/asoption? I get an error:The file has a sealed signature. In order to append more signatures the seal will have to be removed and the file will have to be re-signed. The /force option must be specified as part of the command in order to do so.
This is interesting because appended signatures are unauthenticated attributes, yet it breaks the seal. This means seals are signatures that account for unauthenticated attributes.
What this all culminates to is that a seal is a signature of the entire signature graph, including the things that were being used to cheat Authenticode in the first place.
Sealing appears to be an unauthenticated attribute itself which contains a signature, same for the timestamp. It wold seem that sealing is, in a strange way, Authenticode for Authenticode. The difference being is that a sealing signature has no concept of unauthenticated attributes, and it uses the certificates from the primary signature. That leaves no room for data to be inserted in to the signature once it has been sealed.
To verify this, I first signed a binary without a seal, then changed an unauthenticated attribute, and noted that
signtool verify /pa /all authlint.exewas still OK with the signature. With a seal,signtool verify /pa /all authlint-sealed.exenow failed when I changed the same unauthenticated attribute.This has some interesting uses. As a signer, it gives me more power to ensure my own signed binaries do not get tinkered with, or signatures get appended, or somehow inserting tracking beacons. If someone were to do so, they would invalidate the sealing signature. They cannot remove the seal because the primary signature has the Intent to Seal attribute, which cannot be removed, either. They can’t re-seal it with a different certificate without completely re-signing the primary signature, too.
As a consumer of signed executables, this doesn’t make a huge impact on me, yet. It would be interesting and exciting to see Windows’s security UX take sealing in to consideration. The UAC and Mark-of-the-Web dialogs could conceivably give a more secure indicator if the file is sealed. This would mean that for authors to insert tracking data in to their binaries, they would have to completely re-sign the executable, which is expensive and why they don’t do it in the first place.
As a reminder, these are my observations of sealing. There is no documentation about sealing that I am aware of, but based on the behavior that I observed, it has some very powerful properties. I hope that it becomes better documented and encouraged, and eventually more strictly enforced.
As for using sealing, I would hold off for now. Its lack of documentation expresses that it may not be fully ready for use yet, but it will be interesting to see where this goes.
-
.NET Core CI with Surf
I started taking a look at Paul Bett’s Surf project to do builds for things I work on. Currently I have things building in various other places, like Travis CI, Circle CI, etc. All of these options have one thing in common: they run your build in a Linux container that gets started on every build.
This worked fine for me, in fact I was really impressed with both services. But part of the build process was getting the environment in the right state. Installing packages with apt-get, pulling down some sources, building and installing them with make, etc. This got to the point where 90% of the build time was going to preparing the environment for the build. It eventually came to the point where we needed to be able to build our own container with all of the prerequisites already on it. We also needed something to do the actual building.
Enter Surf. Surf gives us exactly what Travis CI gave us. It checks out your repository, runs a build, and updates the GitHub PR status. That’s it. It’s hugely appealing because it’s stateless, built on node.js, and doesn’t even have a GUI. Contrast this with something like TeamCity or Jenkins, where you need to setup a database, spend time configuring remotes, builds, etc, finding the right plugins to update GitHub PR statuses, etc. Since Surf is stateless and very simple, it also made some sense to run it in a container.
Installing Surf is simple enough. It’s just a
npm install -g surf-build. There isn’t anything more to it.There are two commands that surf gives that are of interest at this point:
surf-buildandsurf-run.Surf-Build
surf-buildis the command that will actually check out a your git repository and run a build. Surf will try its best to figure out how to build your project for you, but the option that works best for me is to just have a file calledbuild.sh(or .ps1 on Windows) in the root of your repository. Whatever you put in your build script is how your project gets built. It could run MSBuild, Cake, Make, etc. If the exit code is zero, your build passed.surf-buildby itself simply just runs the build with the git hash you give it. It works like this:surf-build \ -s 56920f57db4afba1262b6969f577aaedd5e48b36 \ -r https://github.com/vcsjones/AuthenticodeLint.CoreAs always, I experiment with new ideas on my own projects first. This will run my build on the Git hash with the GitHub repository. That’s all it takes.
Surf in a Docker image is especially useful because I can have my whole build environment wherever I am. If I have surf in a Docker container, all I need to do is pull-down my docker image (or build it locally) and simply do this:
docker run -e 'GITHUB_TOKEN=<github token>' \
    -t 720adcff1217 \
    surf-build \
    -s 56920f57db4afba1262b6969f577aaedd5e48b36 \
    -r https://github.com/vcsjones/AuthenticodeLint.Core
A few things.
surf-buildexpects an environment variable calledGITHUB_TOKENto be able to update the pull-request status. It will also use this token to publish a secret gist of the build’s log. If you omit theGITHUB_TOKEN, Surf will still build it, but only if the repository is public, and it won’t set a pull-request status.Surf-Run
surf-buildis fine and all, but it’s entirely manual. We don’t want to have to runsurf-buildourselves, we want to have surf watch our repository and runsurf-buildfor us. Entersurf-run. This command does exactly what I want - it runssurf-build, or any command really, whenever there is a new pull request, or when a commit is added to an existing pull request.It works like this:
surf-run \ -r https://github.com/vcsjones/AuthenticodeLint.Core \ -- surf-build -n 'surf-netcore-1.0.1'surf-runwatches the repository we specify, and starts whatever process you want, as specified after then--. It also sets two environment variables,SURF_SHA1andSURF_REPO. This is howsurf-buildknows what git hash to build instead of being passed in with the-sand-rswitches.Running in Docker
My Docker image needs a few things. It needs node.js to run Surf, it also needs .NET Core, to start. I needed to pick a base image, so I went with
nodejs:boronwhich is the 6.x LTS for node. I chose this instead of one of the .NET Core images because I found that installing .NET Core from scratch on an image was actually easier than installing node.js. Now I need to put together a Dockerfile with everything I need. To start I need all of the dependencies:RUN apt-get install -y --no-install-recommends \ curl \ fakeroot \ libunwind8 \ gettext \ build-essential \ ca-certificates \ gitSome of these are dependencies I need for some projects, others are needed by surf or .NET Core, like
libunwind8. These are the commands to install .NET Core 1.0.1 on Debian Jessie, as verbatim from the Microsoft install instructions:RUN curl -sSL -o dotnet.tar.gz https://go.microsoft.com/fwlink/?LinkID=827530 \ && mkdir -p /opt/dotnet && tar zxf dotnet.tar.gz -C /opt/dotnet \ && ln -s /opt/dotnet/dotnet /usr/local/binThis next step is a bit of a work around. I wanted my images as ready-to-go as possible before actually running them. The
dotnetcommand will do some “first run” activities, like pulling down a bunch of nuget packages for the .NET Core runtime. To do this when making the Docker image, I simply create a new .NET Core project withdotnet newin the temp directory, then remove it.RUN mkdir -p /var/tmp/dotnet-prime \ && cd /var/tmp/dotnet-prime && dotnet new && cd ~ \ && rm -rf /var/tmp/dotnet-primeThere is an open issue on GitHub to facilitate this first-run behavior without side effects, like creating a new project or needing a dummy project.json to restore.
Next, we install Surf:
RUN npm install -g surf-build@1.0.0-beta.15I locked to beta.15 of surf right now, but that might not be something you want to do.
Finally, we specify our command:
CMD surf-run \
	-r https://github.com/vcsjones/AuthenticodeLint.Core \
	-- surf-build -n 'surf-netcore-1.0.1'
Now we have a Dockerfile for .NET Core with surf on it. With my Docker image running, I tested a pull request:
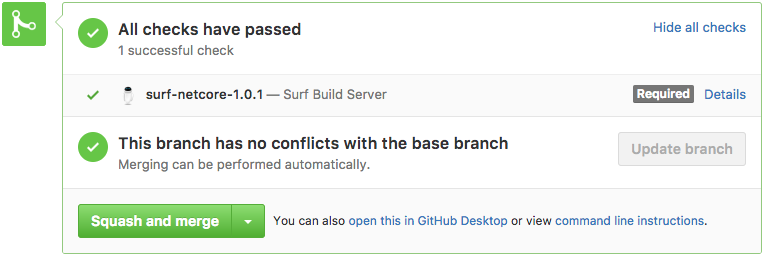
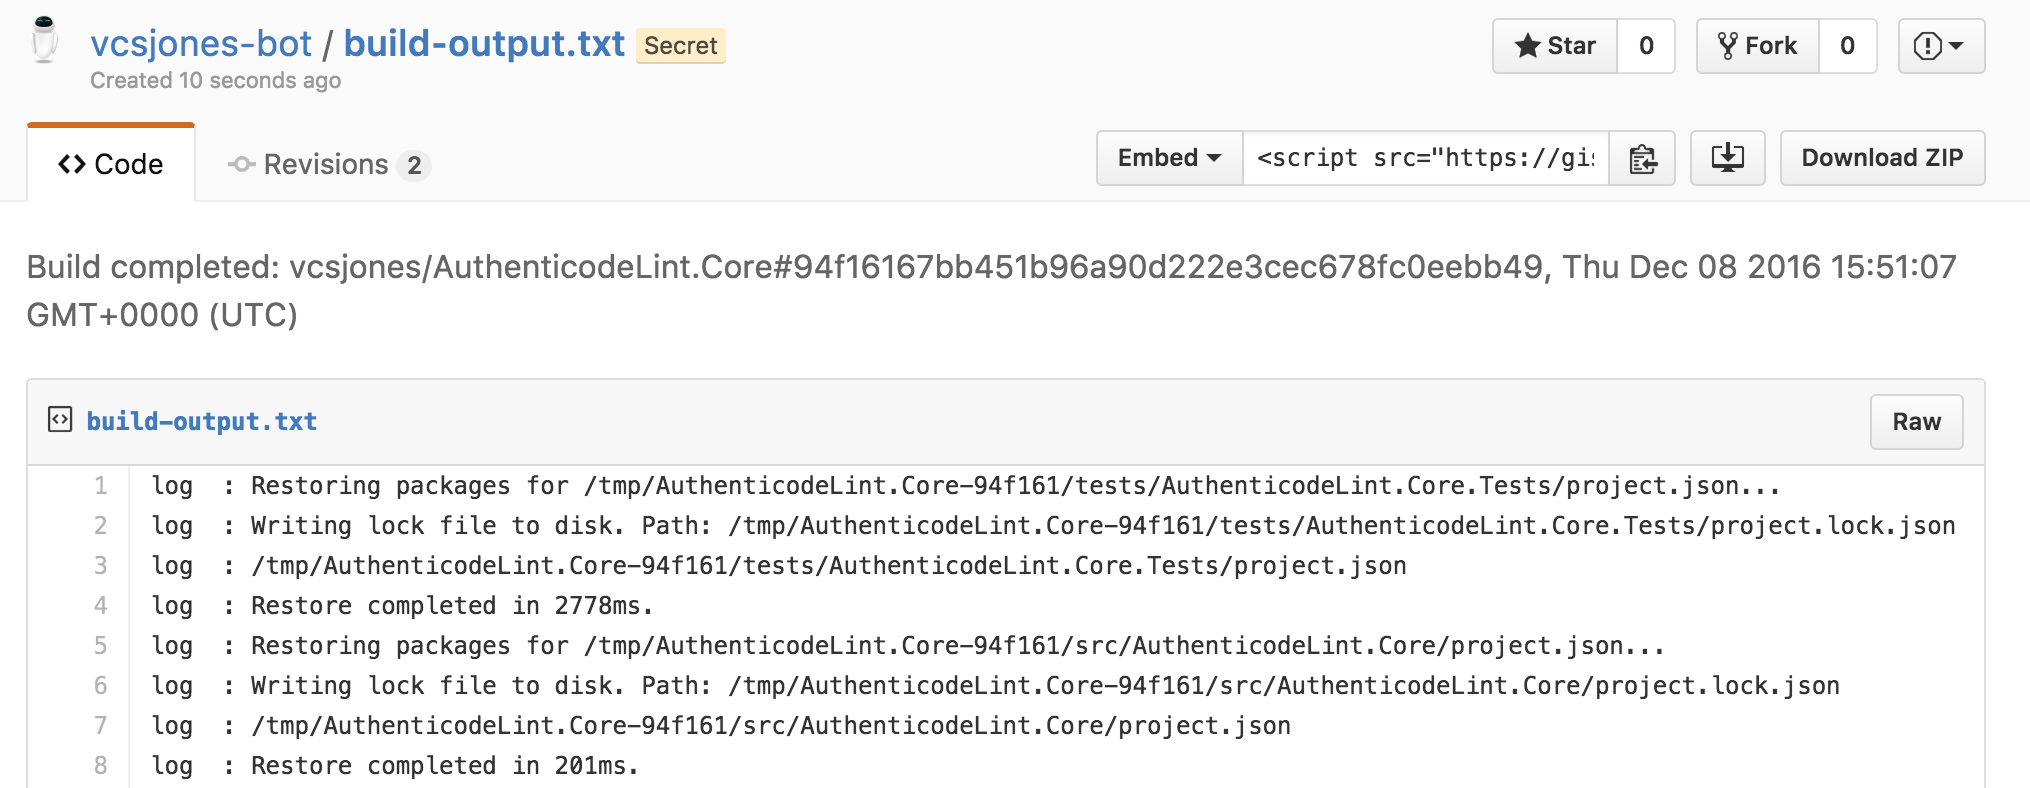
Success! This is exactly what I wanted. Surf publishes the build log as a gist, a simple way to view logs.
The actual build script in
build.shis a simpledotnet restoreand thendotnet testin the test directory. As far as the container itself, I have it running in AWS ECS which works well enough.All in all I’m super happy with surf. It does nothing more than I need it to, and I don’t have anything complex set up. If the container instance starts misbehaving, I can terminate it and let another takes its place. Having everything in a container also means my whole build environment is portable.
-
Making Sense of the .NET CLI
I’ve been using the .NET Core CLI for a while now, and lurk on the GitHub issues. I’ve seen that some of the aspects of it are a little difficult to understand, especially if you want to contribute to it.
What .NET Version Am I Using?
There’s been a number of issues filed where people are trying to interpret the output of
dotnet --version, which today looks something like “1.0.0-preview2-1-003177”. Quite often, the user just installed .NET Core 1.1, then did--versionto see that the update took, but then still noticed that it said something like “1.0.0-preview2-1-003177”. What gives?The first thing to point out is that the Tooling and the Runtime are two different versions. The Tooling has not yet release in 1.0.0 form. The Runtime however, is at 1.1.0 as of writing.
In short,
dotnet --versionis the version of the tooling. If you want the version of the Core Host, thendotnetis the correct option. It will print something like this:Microsoft .NET Core Shared Framework Host
Version : 1.1.0
Finally, there is the
--infooption. This prints some additional information about the runtime environment it thinks you are running, such as the RID, and OS info.There is an issue on GitHub to make
--infobetter. I would encourage feedback on that issue if all of this seems confusing to you.SDK versions and the Muxer
.NET CLI allows installing multiple versions. In macOS, you can list them in the directory
/usr/local/share/dotnet/sdk/. Which version is used currently depends on yourglobal.jsonfor your project.global.jsonallows specifying an SDK version. Ifglobal.jsondoesn’t declare what SDK version it should use, the maximum, non-preview version will be used. Today, we don’t have any versions that aren’t preview, so it’s whatever the maximum version you have installed is.If you do specify a version, like this:
{
    "sdk": {
        "version": "1.0.0-preview2-1-003177"
    }
}
Then that version of the SDK will be used, even if I have
1.0.0-preview4-004130installed.This process is handled by the muxer. The muxer’s responsibility is to bootstrap the SDK and tooling version. The first thing the muxer does is walk down the directory structure looking for a
global.jsonand an “sdk” to use. If it finds one and the version is valid, the muxer loads that SDK’s path and tooling.It’s worth pointing out that
global.jsonaffects everything. If you’re in a directory that has aglobal.json, then everything respects that version of the SDK. If I rundotnet --infoordotnetin a directory that has an SDK, it will behave exactly as that version of the SDK.This makes it easy to have projects use different SDKs by specifying the
global.jsonat the project root. This means I can have the preview4 nightly toolings installed, all of which use csproj for projects, but also continue to buildproject.jsonstyle projects.The last thing to remember is that the muxer looks for
global.jsondown the directory structure. So if a parent directory, or parent’s parent directory has one of these files, it will be respected. The “nearest”global.jsonis honored.An icky quirk of the muxer is that it silently fails. If you ask to use an SDK version that doesn’t exist, it will just behave as if you didn’t specify one in the first place.
Running Applications
You’ve probably noticed that when you compile and publish an application, it does not include a native executable (ready-to-run). It produces a DLL.
If you want to run a project, use
dotnet run.If you want to run a compiled DLL, use
dotnet myapp.dll.Doing
dotnet run myapp.dlllooks right, and it might work, but it might not do what you expect. It runs a project, and passesmyapp.dllas an argument toMain. If you happen to have a project.json in your working directory, then it is running that. -
Building a NAS
Introduction
Back in July I had a backup drive die. Fortunately I found out before I needed the backup, but regardless it got me worried. It was the only backup drive that I had for that data. It was a personal external drive, and nothing more.
This started off with some innocent intentions where I just wanted to have some external storage for big downloads, keeping VM snapshots, and ISOs. At the time, I was on DSL internet. Downloading an ISO for an operating system was no small feat, so I kept them locally.
This innocent intention eventually evolved in to a drive that had important backups. I wasn’t entirely stupid; real important things like family photos, documents, and source code for projects are backed up in to what we now call “The Cloud”. This drive amassed many virtual machines in specific states with specific software installed, a copy of my personal music collection, and periodic snapshots of my entire workstation. Losing them would not always be fatal, but it would mean hundreds of hours of work, lost.
This drive has clearly gone beyond its intended use, and it is showing signs of wear. It has no redundency in itself. Most disappointingly, I know better. I’ve implemented backup strategies for data storage, HSMs, and databases. I know things fail.
So now I need to fix this in a more permanent way. As appealing as offsite backup to a cloud provider is, it just doesn’t scale the way I need it to. I had not one but three of these fragile external drives, totally several terabytes of data. It’s also needed fairly sporadically, not just when systems fail. Pulling down a 250 GB virtual machine image over the internet isn’t fast as I’d like. Even if I have the bandwidth, the cloud provider likely throttles it. I’ll continue to put backups of real backups in the cloud, but for large local storage, I needed something different.
I needed something like a NAS. I had thought for a while the best way to approach this. Some people recommended off-the-shelf solutions that work well for them. Synology came highly recommended. The alternative choice is go down the DIY route. DIY has come a long way with building a personal storage. There are many barebones solutions out there for building it yourself, customizing it, and throwing disks in it.
I decided to build something myself, completely from scratch. I thought this would be a fun project for me to work on from time-to-time, and I could get as weird and crazy with the project as I wanted. I didn’t really have a budget for this, which in hindsight was probably not the best idea.
In the end, I did have a lot of fun building it. Penny (my daughter) was fascinated by it, and she even helped! Here’s how I built my NAS, and what I learned along the way.
read more... -
SRI with Jekyll
Subresource Integrity - or SRI - is something I wanted to learn, so the natural place to get started with it is right here on my blog. Though it has somewhat limited value on my site since I don’t use a CDN, it still proves useful with helping me understand these things in a relatively safe place. After all, no SLA is going to be violated if my blog’s CSS doesn’t load.
In fact, since we don’t have any JavaScript here, the only thing I could use it on right now is my lone CSS include.
To back up, SRI is the practice of including a hash of an external asset where that external asset is included in the current page.
For example, using SRI on my current site looks like this:
<link
    rel="stylesheet"
    crossorigin="anonymous"
    integrity="sha256-xk/GF3tsHVHrcjr3vColduFPXc/PrGx+WNHy+SvR8X8="
    href="/css/main.css">
Where the
integrityattribute includes the digest algorithm along with the digest itself. This is in the same manner and style as PKP. Somain.cssbase64 digest isxk/GF3tsHVHrcjr3vColduFPXc/PrGx+WNHy+SvR8X8=, for now.The purpose of this is if I were using a CDN, or my static content were included on another server outside of my control - how do I know it hasn’t been tampered with along the way? It’s meant to stop something like this:
<link
    rel="stylesheet"
    crossorigin="anonymous"
    integrity="sha256-xk/GF3tsHVHrcjr3vColduFPXc/PrGx+WNHy+SvR8X8="
    href="//malicious.cdn.com/style.css">
Assuming that the page also wasn’t hosted on
malicious.cdn.com, the digest would prevent them from changing it. The hashes would no longer match, and the browser would refuse to load the stylesheet.For CSS this has some advantages, but the real use here is with JavaScript that’s on a CDN.
So SRI is pretty straight forward, in theory. When you get down to it though, many websites have an asset pipeline. These pipelines can minify JavaScript and CSS, transpile them, or any other transformation. These can either happen at build time or at run time. The digests on the assets need to be the digest of the final asset of what the browser sees and actually executes.
As this is a static site, my CSS is actually a SCSS file that gets compiled by Jekyll. Every page includes this stylesheet. I needed to have the generated pages have the hash of my stylesheet after it gets compiled. So either I needed to do this after Jekyll compiled the site, or figure out a way to get Jekyll to put the hash in.
Jekyll, or more specifically Liquid, support custom tags. What I wanted to be able to do was put something like this in my template:
<link
    integrity="{% sri_scss_hash css/main.scss %}"
    href="/css/main.scss" />
All I had to do here was make the
sri_scss_hashtag. How hard could it be?Well, not entirely straight forward, considering I know little about ruby. I used Jekyll’s source code as a reference on how to implement this. The final version of this plugin is on my GitHub repository for this site.
It uses the existing
IncludeRelativeTagJekyll tag as a base, and instead of including the content as-is, it runs it through the SCSS converter, first. The meat of it is therenderfunction:def render(context) cache_compiled_scss(@file, context, lambda { site = context.registers[:site] converter = site.find_converter_instance(Jekyll::Converters::Scss) result = super(context) scss = result.gsub(/^---.*---/m, '') data = converter.convert(scss) "sha256-#{Digest::SHA256.base64digest data}" }) endThis works well, but it does one thing that feels a little hacky to me which is use a regular expression to remove the frontmatter from the stylesheet before running it through the converter. The frontmatter is required for Jekyll to trigger its compilations for the files, but the converter itself doesn’t like the frontmatter. I feel like there should be a better way to remove the frontmatter, but this works for now. If there are any Jekyll experts out there, I would love to know a better way to do this.
All you need to do then is drop a ruby file in
_pluginsalong with a line to register the plugin, and you can start using the plugin to generate SRI hashes for SCSS stylesheets.I learned a few things implementing this. Specifically, the
sandboxContent-Security-Policy directive gave me some trouble. This took me a little while to understand, but the SRI check will fail if the origin the document does not have Cross-Origin access to the resource.All in all I think SRI is a worthwhile investment if you’ve got all of the low-hanging fruit already picked. It’s not as trivial to do as it would first seem do to the complexities of build processes.